Cold pressed soap or cold processed soap is a great option for homemade soap makers of all experience levels. Cold pressed soap is also a great choice for beginners because it does not require special equipment, and the results are predictable.
Making your own soap is a fun, fulfilling, and eco-friendly way to cleanse your skin. This article will show you how to make cold pressed soap from scratch using natural ingredients! With some ingredients and a few simple steps, you’ll be on your way to creating custom soaps that are perfect for your needs.
But, wait for a sec; what are the differences between cold-pressed soap and hot-pressed soap? What are the basics of cold process soap making? Here’s everything you need to know about how to make cp soaps from scratch!
Soap Making
Soap making is an art that requires patience and a sense of adventure. There are four different ways of soap making for bar soaps – cold process, hot process, melt and pour soaps (m&p), and rebatched or repurposed bars. Cold process soapmaking is one of the most popular methods for creating artisanal soaps.
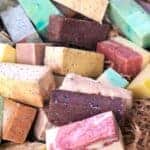
Cold pressed soap designs are a popular way to decorate cold process soaps because they leave the surface of your bar mostly untouched. That means you can show off all those beautiful swirls and colors that come from using different oils in your cold pressed soap recipe!
Cold Pressed Soap
Handcrafted soap is made by mixing a lye and oil solution (called saponification) through an exacting process that includes precise measurements, which ensures the creation of soap. The result is a mild yet effective cleanser for the entire body.
The chemical name of lye or caustic soda is sodium hydroxide, and it is a necessary ingredient in the making of soap. The oil used can be either animal or vegetable-based.
Cold pressed soap is made by combining a lye (sodium hydroxide or caustic soda) with oils, kinds of butter, or blending of the two without any heating. The saponification (making soap) occurs when you combine the lye and oils, and it doesn’t need any additional heating. This is why cold processed soap is also called “natural soap” – because it doesn’t use harsh chemicals or solvents like hot processed soap does.
You can use any soap recipe for cold pressed soap with your favorite essential oil scent.
Handmade Soaps Are Called Natural Soaps

When you buy soap from a grocery store, you’re getting a product that has been made in a factory. Factory-made soaps use harsh chemicals and solvents to speed up the saponification process, which is why we know them as “chemical soaps.”
On the other hand, handcrafted soap uses natural ingredients like lye and oils combined through an exacting process to create soap. This makes handmade soap mild yet effective for cleansing the entire body.
Handmade soaps also use various oils, butter, and fragrances to give them unique properties that you won’t find in store-bought soaps.
Cold Pressed Soap V/s Hot Pressed Soap
The biggest difference between hot pressed and cold pressed soap is that in cold processing, saponification (the process of making soap) takes place when the lye and oils are combined, so no additional heat is needed. On the contrary, in hot processed soap making, the mixture is heated before it’s poured into molds – this allows for a faster production process.
Hot processed soaps use harsh chemicals
Hot processed soap making also uses harsh chemicals and solvents to speed up the saponification process, which is why it’s also called “chemical soap.” In the cp soap making process, essential oil or additives are mixed after the gel phase. While in the hot processed soap making, essential oil and colors are added before the gel phase. The soap goes into the gel phase almost instantly.
You can do swirls, color blocks, and designing with cold pressed soap
In addition, the cold process soap making process lets you do swirls, color blocks, and other intricate designs that you just can’t do with the hot process soap making. In contrast, hot process soap doesn’t let you do any designs. Soap made in a hot process is heated from the outside, while soap produced in a cold process is warmed from the inside out.
Saponification is faster in hot pressed soap
Cold process saponification takes around 4-6 weeks, so cold process soapmaking takes longer than hot process. This means you have to wait a few days before your soaps are ready to use! While hot processed saponification only takes around four hours, soap making is faster.
Cold pressed soaps are shinier than hot pressed ones
The other big difference between cold process and hot process soap is their appearance. Cp soaps look more shiny and translucent because they don’t have the same level of glycerin as hp soaps. Hot processed soaps look rustic because they have a lot more glycerin.
Cold pressed soaps are softer, too!
Hot processed soap is harder than cold processed, and this hardness of hot processed soaps also helps them last longer! Cold pressed soap can become softer with time due to the saponification process occurring after making your bars.
Cold pressed soap is gentle on the skin
These soaps slowly release glycerin, a natural humectant that draws moisture to your skin, making it soft and supple. Handcrafted cold pressed soaps also benefit from being made from high-quality ingredients such as organic oils and butter like coconut oil or shea butter.
The downside to cold pressed soap is that it can take longer to make than hot processed soaps. But the end result is a bar of soap that’s gentle, moisturizing, and luxurious!
Basics Of Cold Pressed Soap
Before you can make cold pressed soap, there are a few things that you’ll need to get started. Most of them will probably be in your kitchen already! Here’s what you’ll need:
Safety goggles and gloves: Safety goggles and gloves protect your eyes and hands from the lye solution – which is why it’s really important for soapmakers to always wear them!
A digital scale: A digital scale to weigh the ingredients for your recipe, so you must have one that can measure in both grams and ounces.
An oven thermometer: This will help you make sure that your soap mixture doesn’t get too hot, which could cause it to go into the gel phase.
A stick blender: To mix the soap ingredients and help them saponify. You can also use a hand mixer or even a food processor if you don’t have a stick blender for making homemade soap.
Soap mold: These come in all shapes and sizes, so it’s important to find ones you like. The most common shapes are loaf molds, round or square bar molds, and even cute heart-shaped soap molds!
Glass pitcher: To mix the lye solution with the water. When working with lye(sodium hydroxide), you mustn’t use metal containers or utensils because they can react with them and create dangerous fumes.
Measuring Cups: You’ll need these to measure the ingredients for your recipe.
Spoons: You’ll use these to stir the soap mixture and also to scoop out the soap once it’s been poured into the molds.
Now that you have all the supplies, let’s discuss how cold process saponification works!
The Science Of Cold Pressed Soap
When making cold process soap, the saponification process happens when the lye solution is mixed with the oils. This reaction causes a chemical change in the oils, which transforms them into soap!
The recipe that you use will determine how hard or soft your final bars of soap will be. A harder soap bar will last longer in the shower, while a softer bar will be more gentle on your skin.
Keep in mind that cold pressed soaps can take up to six weeks to saponify fully. They may still shrink or lose their shape a bit during this time. But as long as you allow them to cure for the full six weeks, they’ll be gentle and moisturizing!
The Ingredients You’ll Need To Make Cold Pressed Soap:
The first thing you need for making cold pressed soap is lye flakes, a strong base used to saponify (turn into soap) the oil and butter. The next essential ingredient is oil, which can be either a mix of different oils or all one type of oil.
You’ll also need distilled water, additives such as exfoliants, spices, and flower petals. In addition, you can add spices of your choice, fragrances, or essential oil and colors, as desired.
Now, you know the basics of making cp soaps from scratch.
Let’s get into the process!
Measure Lye And Water
On a digital scale, weigh out the lye and add it to a glass pitcher and close the lid tightly. Measure water according to the recipe and pour it into a separate container.
Tip: Add a little more water than called for in the recipe to help cool down the lye solution quickly. This will prevent it from overheating and causing your soap to go into the gel phase.
When working with lye, ensure you’re using safety goggles, gloves, and long sleeves! It’s important that no skin is exposed to it at any time during the process. Also, make sure your work area is well-ventilated, so fumes don’t build up in there.
Incorporate Water And Lye
Next, add the distilled water to the lye and stir until dissolved. Stir the lye solution for about five minutes to make sure all lye granules have dissolved. The mixture will heat up as you do this, but keep stirring until it cools down again. Then set this mixture aside for later use.
Tip: Don’t use metal utensils for mixing because they can react with the lye and cause dangerous fumes! I recommend using spatulas instead of spoons when mixing. Spatulas are easier to handle and clean up faster when you’ve mixed your soap.
Measure The Oils
Follow your recipe and measure the oils. Set aside all of the oils in a separate container once you have all of the oils measured out.
Tip: Make sure you weigh the oils, not measure them by volume. This will ensure that your soap comes out perfectly every time.
Warm And Melt The Oils
Warm the oils in a soap making pot on the stove once they’re warm enough and get 110 degrees Fahrenheit to turn off the heat. You don’t want to cook the oils; just get them up to temperature.
Now add liquid oils to the melted oils, and stir to combine. This combining process decreases the temperature of oils. We need the oil temperature to be around 100 degrees Fahrenheit.
Tip: When using solid oils (like coconut oil or shea butter), melt them first before adding them to the other liquid oils. This will help them mix together more easily and prevent chunks from forming later.
Mix Oil With Lye Solution
Make sure to keep essential ingredients nearby because the next step is mixing the lye solution with oils. Slowly, pour the lye mixture into the pitcher containing oil while stirring slowly but constantly.
It’s very important to pour the lye mixture in slowly and keep constantly stirring to combine the two ingredients. If you pour in too quickly or stop stirring, the lye could react with the oils too quickly and cause your soap to become cloudy.
Once everything is combined, use a stick blender to blend the mixture until it’s thick and reaches a pudding-like consistency. This only takes 30-60 seconds of mixing using your hands (the primary tool) and a stick blender.
Add Essential Oil or Scents

You can blend essential oils or fragrances of your choice at this stage. Let your soap rest for about five minutes after adding these ingredients before proceeding with further stirring because they need time to incorporate into the soap fully.
Tip: Never add essential oils to the lye solution, your soap won’t be as strong-smelling when it’s finished because they’re more diluted by water and saponified in the process of making cold pressed soaps. So I recommend adding fragrances after pouring into the mold.
Add Spices or Extra Ingredients To Soap
If you’re adding any extra ingredients like spices, stir them in at this point. You can add herbs, flower petals, or other things to jazz up your soap. Make sure they combine well with the soap before pouring it into your mold.
Tip: When using fresh herbs or other ingredients that might make your soap spoil, add them after saponification has completed. Adding them at the end will help prevent any bacteria from growing in your soap.
Add Color To The Cold Pressed Soap Mixture
Mix a few drops of liquid soap colorant to the mixture and stir in a single color soap. This is a very simple step, but it can make your cold pressed soap look more professional if you use exactly the right amount.
A little goes a long way! You’ll want to stir this gently because any unnecessary mixing could cause too many air bubbles to form in your soap.
For A Swirl Effect, Follow These Steps:

Separate half a cup of soap mixture in a cup and add a different color to it. Now from a height, pour the color mixture into the center of the soap pot and stir. Don’t stir too much otherwise; you will get muddy color.
If you’re adding multiple colors, wait about five minutes after adding the first color before proceeding with the next one. This will give the colors time to blend and create a more even effect.
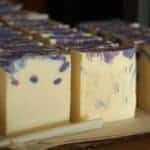
Pour Soap Into The Soap Mold
Pour the soap mixture into your mold, and press it down firmly to make sure it’s evenly distributed. Use a silicone spatula or spoon to move the soap mixture around so that there are no air bubbles, and it’s as even as possible.
Pick the mold up and give it a few gentle shakes to help the soap settle. Now leave your soap to set for 24-48 hours. You’ll know it’s finished when it’s hardened and no longer sticky to the touch.
Congratulations! Your cold process soap is now ready to use. Enjoy!
Substitute Oil In Cold Pressed Soap Recipes
Cold pressed soaps are very forgiving, but it’s still important to follow the recipe as closely as possible.
Some oils are extra mild such as coconut or olive oil and make great soapmaking oils because they produce a gentle lather that leaves your skin feeling soft after use. However, these two ingredients alone will not create good quality cold processed soaps!
Primarily, you can use two kinds of oils to make soaps: hard oil and soft oil.
Hard Oil:
Mineral or vegetable oils and some animal fats are considered hard oils. These oily molecules dissolve easily in water and create a gentle, creamy lather that makes great soap!
Hard Oils include olive oil, sunflower seed oil (a must-have!), coconut oil, and tallow(beef fat).
Soft Oil:
On the other hand, some oils like palm kernel oil and shea butter are considered soft. They produce a lather that’s more waxy than creamy and can be drying to your skin!
Good quality cold processed soaps will contain both hard oils (about 50%) and soft oils (about 50%). This combination creates a soap that’s gentle enough for everyday use but still has plenty of lather to get the job done.
If you’re looking to substitute oil in a cold process recipe, try to find one that is close to the original ingredient. For example, if the recipe calls for palm oil, you could try using coconut oil instead. They have similar properties and create a soap close to the original recipe.
One of the great things about cold process soapmaking is that you can substitute certain oils if you don’t have them at the time of soapmaking or if you want to create a specific type of soap.
For example, if you’re looking for a bar of soap that’s high in conditioning properties, you might use more olive oil in your recipe. Or, if you want a soap that’s more cleansing, you might use more coconut oil.
Tips For Preventing Scent Fading In Cold Pressed Soap:
Use essential oils that are high in fragrance oil content. For example, lemon or orange essential oils have a higher percentage of fragrance oil than lavender or tea tree oils.
Add the essential oils after saponification process completes. This will help them better incorporate the soap and prevent any scent from fading.
When using a fragrance oil, make sure it’s meant for use in soaps. Some oils can cause your soap to lose its scent over time.
Store your cold pressed soaps in a cool, dark place. Heat, light, and air can all cause your soap to lose its scent over time.
Calculate A Soap Recipe To Fit Mold Size
Since your molds are standard size, you can choose any soap recipe to make cold pressed soaps. However, if one of your goals is to sell them in the future, calculating a recipe that fits into these molds will allow for easy portioning and packaging!
You can calculate a recipe by weight or volume, but I prefer to use weight because it’s more accurate. When you’re working with soap making ingredients, even a small change in measurement can result in a completely different soap!
You figure the mold’s volume in cubic inches by multiplying it by 0.4, then input that number into an online lye calculator to find out how much each oil and other substances are worth using in your recipe.
To calculate a recipe by weight, you’ll need to know the following information:
- Total weight of your mold(s)
- Weight of each type of oil in the recipe
- The amount of lye needed for your recipe (found by using a soap calculator).
All you need to do is multiply these numbers together. For example, if my mold has a total weight of 16 ounces and I’m using olive oil (which weighs in at 0.138 ounces per cubic inch), I would need to use 11.07 ounces of lye for this recipe.
Using An Online Calculator:
To make it a little easier, I’ve used an online lye calculator to create a recipe that will fit into your molds. You can calculate it on the internet easily. Just input the weight of your mold, the type of oil you’re using, and how many ounces of lye the recipe requires. The calculator will do the rest!
EndNote:
Making cold pressed soaps at home is a great way to start a soap making hobby. It’s a fun, easy process, and the best part? You can tailor it to your own personal preferences. I hope you’ll give it a try!