Soap Carving For Beginners – How To Create Custom Soaps

  • By: Soap Crowd
  • Time to read: 12 min.
Affiliate Disclaimer

As an affiliate, we earn from qualifying purchases. We get commissions for purchases made through links in this post.

Carving soap is a fun, creative activity that people of all ages enjoy. With a few simple carving tools and patience, anyone can create beautifully designed custom soaps.

If you're new to carving, don't worry. This ultimate soap sculpturing guide will walk you through everything you need to know about carving soap, from what soap to use and what carving tool you'll need to how to carve your very own soap flower.

soap carving flower

Carving Soap

Soap carving is a great way to add a personal touch to your soap collection. You can carve soap into any shape or design you like and make it unique to you. Carved soap also makes a great gift for friends and family members.

Soap sculpturing is becoming more popular among soap enthusiasts. People from all age groups, especially kids, are carving soap into different shapes and cute patterns. Social media is loaded with inspirational soap carving videos that are satisfying to watch.

The main reason to carve soap is that it is unique; it will make your collection one of a kind. It also can be given as gifts that will be cherished and remembered. When carving soap, there are endless possibilities of what you can create. Carving can be therapeutic and satisfying. The act of carving can be calming and help to relieve stress. It is also a great way to express your creativity.

You can craft intricate sculptures, shapes, geometric patterns or keep it simple by carving a flower. Engraving their initials in the soap would be great to make something special for someone.

This fun activity doesn't require any special skills or talent, just a bit of patience and imagination. It's an easy and inexpensive way to make beautiful and unique soaps.

Let's dive into the ultimate soap sculpting guide for beginners.

The Ultimate Soap Carving Guide for Beginners

A short History:

Soap carving has been around for centuries, and it's not a new trend. The oldest record of soap carving comes from Thailand. Archaeologists have found soap carving tools in ancient Thai temples that date back to the 14th century. In old times people carved vegetables and fruits to decorate their homes and temples.

Soap carving activity also became more popular in the 1920s and 1930s, when a multinational company, Procter & Gamble, announced a soap carving competition. After that, carving soap became a national hobby in the United States.

Nowadays, carving soap has become an art form, and people use it to express their creative side and sometimes make money.

Why Would You Carve Soap?

Carving soap is a great way to add a personal touch to your soap collection. Though you can carve soap into any shape, design, or pattern you like, such as intricate shapes, beautiful designs, or models of animals and flowers.

My favorite hobby is soap making, but sometimes when I have a lot of time, I like to take a soap bar and craft it into something special with my paring knife. Indeed, it's really easy to do and a lot of fun too. My younger son learned soap carving in school when they made DIY carving projects in class. It's a great fun activity for kids because it helps them develop their fine motor skills.

Later on, I purchased some books by Howard K Suzuki, a master of carving soaps. He shares his basic carving techniques and beautiful soap designs in his books. If you want to become competent in how to carve soap, I recommend checking out Howard K Suzuki's books.

Soap sculpturing is not only a fun activity, but it's also a great way to create custom soaps. The best thing about soap sculpting is that you may also use any low-cost white soap bars to high-end soap bars to keep your sculpting costs low. It is a very common practice in grade schools, where carving is often considered fun. However, in many professional sculptors' workshops, the carving is often used to create models for carving in other materials. On the other hand, some people crave soap for beautiful and intricate designs as a profession and earn money selling them.

I used some basic tools such as a plastic knife, butter knife, and potato peeler to make soap sculptures in my workshop. Certainly, you can find these carving tools in the kitchen.

Soap Carving Ideas to Make Custom Soap:

You can make anything you want; it depends on your creativity. You can surf google, youtube, Instagram, or any other social media platform for soap sculpting ideas. Many talented individuals are sharing their work and inspiring others. The Internet has tons of ideas, but here are some of my favorites:

soap carving ideas

Soap Carving ideas for beginners:

  • A flower: A rose, lily, or tulip is a timeless classic.
  • A heart: For the love of your life or a friend.
  • A fruit or vegetable: A watermelon, apple, or pumpkin.
  • An animal sculpture: Carve a cat, dog, bird, or turtle.
  • A geometric shape: A cube, sphere, or pyramid.

For Intermediate carvers:

  • Carve a word or phrase: "I love you," "Happy Birthday," or "Get Well Soon."
  • Clothing designs
  • Plants

For Expert Carvers

  • Structures of the famous building.
  • Famous personality sculptors.
  • Animal sculptors such as a turtle.

Choosing An appropriate Carving Soap:

The type of soap bar you use for carving is very important. It would help if you used a soft soap to hold its shape when carving. Using a hard soap won't be easy to carve, and the design will not be as precise. I prefer to use Ivory soap because it is less expensive, and working with it is a lot easier. You can use any soap that you like but make sure it is soft enough to carve.

Hard soap bars are difficult to carve because they do not hold their shape, and the carving will not be as precise.

You can use homemade soap for designing or buy soap from the store. If you use store-bought soap, make sure it is unscented and uncolored. You don't want your carving design to smell like soap!

What Supplies Do I need:

The only supplies you need for soap sculpturing are carving tools and soap. You can find carving tools in the kitchen or at craft stores. I prefer to use carving tools that are sharp and easy to handle. At home, you have many items like a butter knife, paper clip, toothpicks, or popsicle sticks that can be used as a carving tools.

Some carving tools that you can use:

Sculpting Knives:

You can use a variety of knives for sculpting soap. A paring knife is a good carving tool because it is small and maneuverable. You can also use a potato peeler, but it will not give you as much control as a carving knife.

Paper Clips:

They are easily available in your home. You can use them for detail work or carving fine lines on your soap bar.

Pencils:

Use a light-color pencil to draw a design on the soap before you start carving. This is helpful if you want to carve a complex design.

Rulers:

A ruler will help measure the soap and make sure the carving is symmetrical. It will also help you to make straight lines.

Dremel Tool:

A Dremel tool is a power carving tool that can carve soap. It is a rotary tool that has a variety of attachments. You can use the Dremel tool to carve soap by attaching a carving bit. Only pro carving artists use a Dremel carving tool.

Soap Carving Kits:

A variety of soap carving kits is also available online and in stores. These carving kits come with carving tools and soap. These kits include many carving tools that you may not need. I recommend only buying a carving kit if you plan on carving soap frequently. Some kits also come with soap carving patterns.

Create Custom Soap Carving For Kids/Beginners

Let's learn how to create custom soap sculptures!

You Will Need:

  • Some cheap soap bars
  • Pencil
  • Potato peeler
  • Knives (butter knife, plastic knife, and pair knife) or wooden knife
  • Some small tools (toothpick, paper clip)
  • Sponge

Soap Carving – Instructions:

Trace the Design:

Take the Ivory soap bar and gently rub it with a sponge to clear the brand name. First, you need to trace your design on both sides of the soap. I use a pencil because carving with a pencil is very easy to do, and you can make mistakes. You could use any geometric shape, an animal, a flower, or anything else you can think of!

Draw An Outline:

Make an outline using a pencil on both sides of the soap. Make sure the outline is visible and dark enough.

Start Soap Carving:

Now it's time to start carving! With a potato peeler, you can shave off the top layer of soap until you see your pencil marks. With a potato peeler to make smooth edges. Be very careful not to cut yourself.

Start Detail Work:

Once you have carved out your design, take your butter knife and start carving out the details. Carefully carving out the details is what makes your carving look good.

soap carving with tools

Make Fine details:

Now that you have carved out all the details. Take your plastic knife and start carving out the smallest details. Finally, take your pair knife and carve out any last details. You can also use toothpicks and paper clips to make small details.

If your design has holes, you can use a toothpick or paper clip to carve out the holes.

Polish the soap carving:

It's time to polish the soap! Gently rub the carving with a sponge to smooth out any rough edges. Use little pressure while rubbing.

Use a paper towel to collect the excess soap shavings. You can use these soap shavings to make new soap carving designs!

Now that you have finished carving your soap, you can wash it off and use it as a decoration piece or give it away as a gift!

Now that you know the basics of soap carving go out and carve some amazing soap sculptures.

Create Adorable Soap Sculpture:

Making soap sculptures is a great way to show your carving skills. It's not as easy as it looks, but anyone can do it with practice! Soap carving activity is a perfect way to bond with your kids. It's a great activity for rainy days, winter days, or any day when you're feeling creative!

When you're ready to start, look at some pictures of soap sculptures for inspiration. Once you have an inspiration, sketch it out on a piece of paper. This will help you plan your carving and avoid making mistakes.

Now that you know what you're going to carve, it's time to get started!

Instruction:

When you decide to create a soap sculpture, there are some things you need to consider, such as the size, shape, and design of your sculpture. When making a sculpture out of the soap, you must concentrate on the head, arms, and legs. The most difficult part is the head because it requires detailed work.

You need to have a sharp carving tool to make small details in the head. However, if you want to create a bigger soap sculpture, then use a knife to carve out the basic shape. After that, use a knife to make the details.

  • First, trace the sculpture design on the soap with a pencil. If you want to make a symmetrical sculpture, you can fold the soap in half and trace only half of the design.
  • Start carving out the basic shape of your sculpture with a plastic knife or potato peeler. Although you're unsure how to hold the knife, watch some videos or ask someone for help. Soft soaps are easier to carve than hard soaps.
  • Once you have carved out the basic shape of your sculpture, it's time to start carving out the details. Use a butter knife or a chisel to make small cuts in the soap.
  • Use a sharp knife to cut corners off the soap. This will help make the details stand out more.
  • Carefully scrape away the excess soap shaving with a paper towel. Now use a paper clip or any sharp carving tool to make fine details.

Soap carving is a good clean, fun activity to show your creative side. With practice, anyone can create amazing soap sculptures! So get creative and make what comes to your mind.

Basic Soap Carving Techniques For Beginners

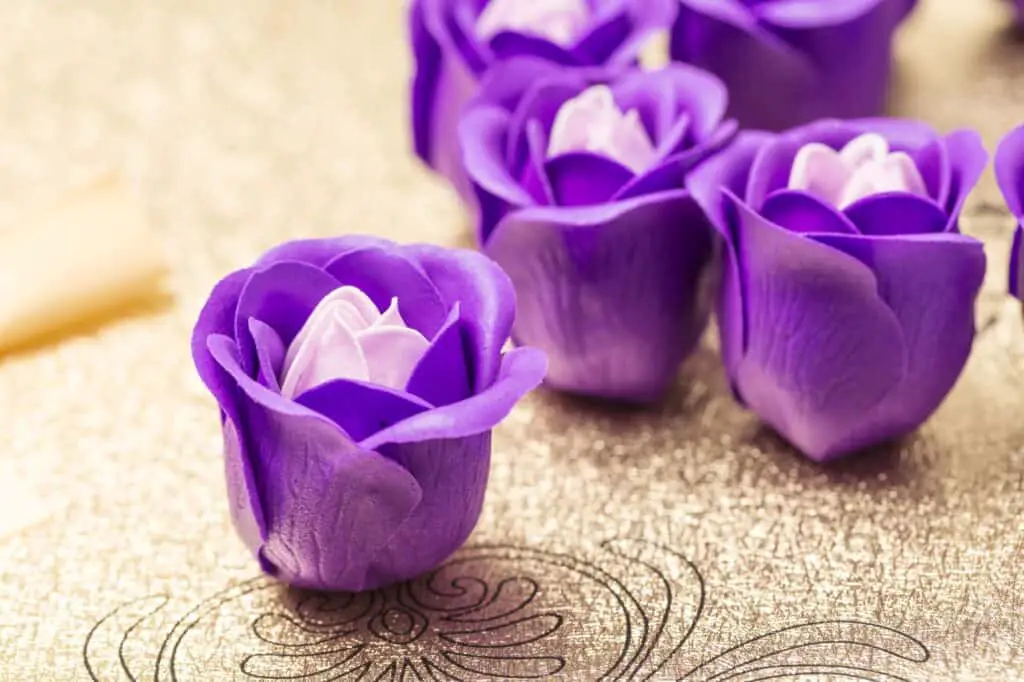
Soap flowers in the market in France.

Start with simple designs:

As beginners, it is best to start with simple designs. Once you get the hang of it, you can try carving more complex designs. You can choose flowers, hearts, or other simple designs that don't require too much detail work. Your kids can also participate in this good clean, fun activity and carve simple designs like animals or cartoon characters. Carving name initials on the soap is another great idea for beginners.

Choose the right soap:

Not all soaps are equal when it comes to carving. It is important to choose a soft and easy-to-carve soap. Avoid using hard soaps as they will be difficult to work with. I like to work with Ivory soap because it always gives me excellent results.

When looking for a special soap for carving, consider the many options available. If so, it's handy to have a variety of soaps on hand. It's unnecessary that you like my recommended soaps; you can try different types and see what works best.

Be patient:

Work slowly and be patient when carving your soap. Rushing will only lead to mistakes. The best way to avoid making mistakes is to take your time. It's all right to make errors, and they'll happen sooner or later. However, the greatest approach to prevent them is not to hurry. This is your project, and you are worth the time it takes!

Use warm water:

If your soap becomes too hard to work with, simply dunk it in some warm water for a few seconds. This step will make the carving process much easier. Also, warm water will allow you to apply less force when carving, which will result in fewer mistakes.

Keep Soap Shaving for Future Use:

Be sure to save your soap shavings! You can use them to make interesting designs on the top of your carved soap or use them as a decoration in another project. If you do not use excess soap right away, be sure to store them in an airtight container so they don't dry out. Later on, you can use them as laundry soap or melt and pour soap recipes.

Choosing Right Surface:

The best surfaces for carving soap are smooth and flat. Avoid using textured or bumpy surfaces, as they will make it difficult to carve the soap. I always work on a cutting board or a piece of wood when carving soap. Also, cover your surface with an old newspaper or inexpensive tablecloth; this will make the carving process much easier and less messy.

FAQs

What equipment or guage do I need to start the carving activity?

A: All you need is a sharp knife, a cutting board or piece of wood, and some soap. You can use any gauge, pocket knife, wooden knife, or paper-knife, whatever you have in hand.

How do I make fine details in my carving?

You don't require any fancy gauge to make fine details. A paper clip or any sharp carving tool can be used to make small cuts in the soap.

Are there any quarry books available on soap carving?

A: Yes, a few quarry books are available on soap carving. However, I would recommend checking out some online tutorials or videos before you start carving. This way, you can get a feel for the carving process and see what techniques work best for you. But if you are a bookworm, you must read Howard k Suzuki's books on soap carving.

How do you make fine lines on sculpture?

To sculpt fine details, you can use a paring knife, toothpick, or wood knife. Use a very sharp knife to get smooth cuts. You can also use a rotary tool with a fine-gauge bit to make precise cuts. Experiment with different gauges and instruments to find the best ones for your work project.

Endnote:

Soap carving is a great way to create custom soaps. Anyone can carve beautiful and intricate designs into soap with a little practice. As a beginner carver, you can take inspiration from online tutorials, videos, or books.

You can make beautiful sculptors, shapes, or anything you can imagine. Soap carving is a fun and rewarding hobby that anyone can enjoy. In addition, patience is the key to success when carving soap. With a little practice and basic techniques, you'll be able to create amazing soap sculptures!

Happy carving

How To Kill Fungus With Antifungal Soap

Previous Post

How To Kill Fungus With Antifungal Soap

Next Post

How To Make Vanilla Essential Oils For Soap

How To Make Vanilla Essential Oils For Soap